
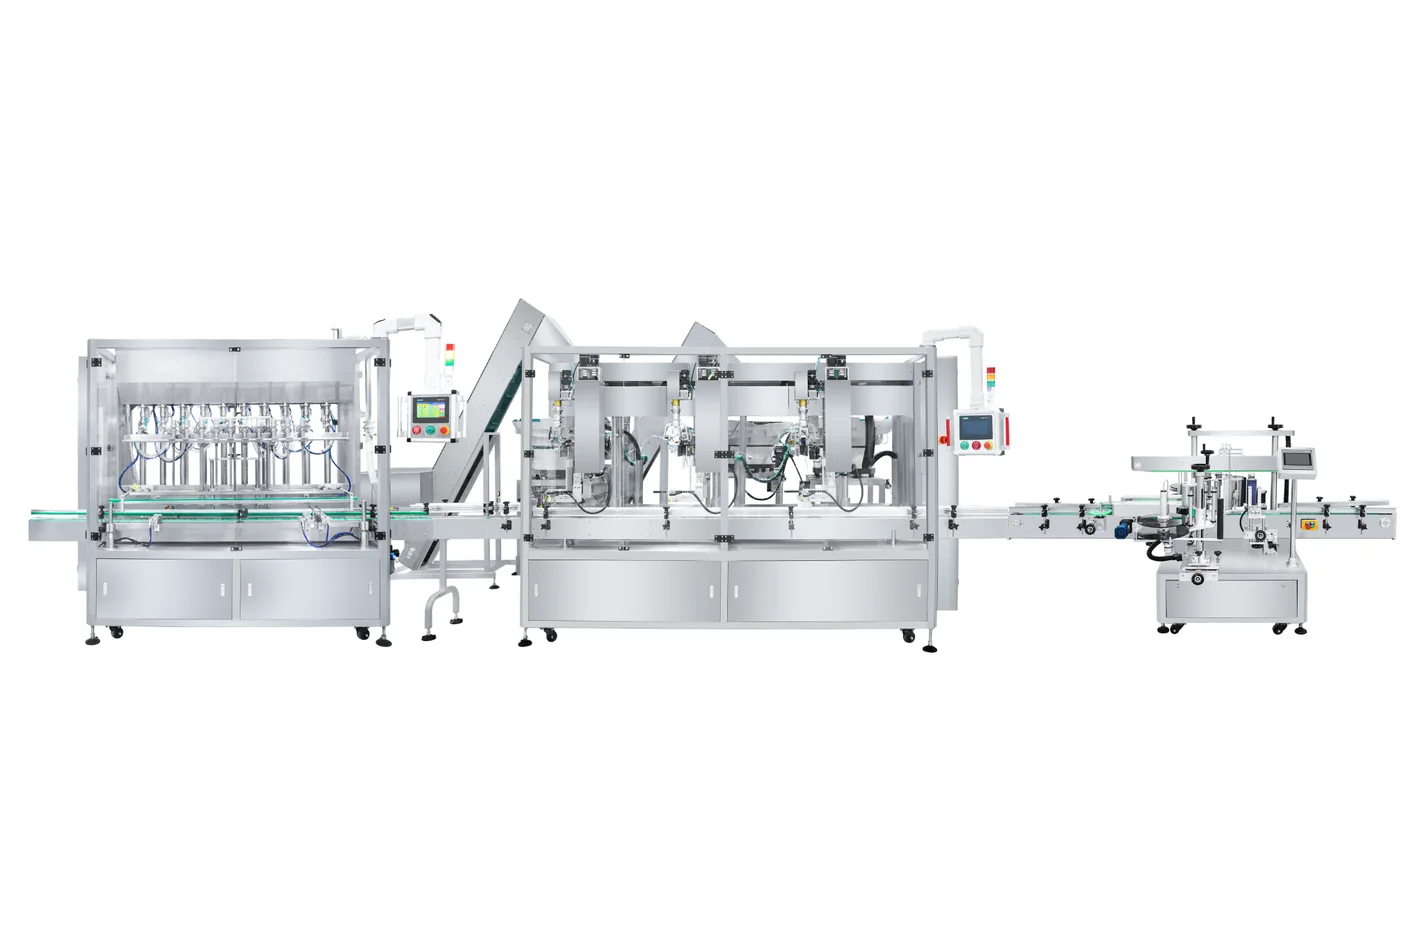
Preventive maintenance is not a generic calendar pinned to the wall. A useful plan connects each inspection or service task to the actual machine, component, product, operating hours, cleaning method, observed wear and consequence of failure. It also tells operators what they can check, what requires trained maintenance personnel and how the result will be recorded.
1. Build the Plan From the Real Machine
A filling, capping and labeling line can use different pumps, nozzles, seals, cap-tightening structures, label paths, conveyor drives and sensors. That is why a maintenance checklist copied from another project can miss the highest-risk component or ask for work that does not apply.
Build the equipment register after the final configuration is approved. For each module, record the manufacturer and model, serial number, component list, manual reference, permitted service method, approved lubricant where applicable, normal setting range, wear limit or inspection criterion, spare-part number and responsible role. Link this register to the electrical and pneumatic drawings and the latest backups provided with the project.
2. Set Checks by Frequency and Trigger
“Daily, weekly and monthly” is a useful way to organize the first draft, but calendar frequency alone is not enough. A machine that runs two hours per week and a line that runs multiple shifts should not automatically receive the same component-replacement interval. Combine calendar checks with operating hours, cycles, condition trends and events such as a crash, jam, product leak, deep clean or format change.
| Timing | Purpose | Typical observations | Escalate when |
|---|---|---|---|
| Start of shift or production lot | Find obvious changes before normal production | Guards and interlocks according to the approved startup procedure, loose or damaged parts, leaks, unusual sound, air pressure, product path, guides, sensors, belts, cap tooling, label path and controlled first-piece result | A safety device, leak, damage, recurring alarm or first-piece result is outside the approved condition |
| During production | Detect gradual deterioration | Fill result, dripping, foam, cap application result, label position, rejects, jams, air use, temperature where monitored, noise, vibration and stop reason | The trend changes, adjustments become frequent or one module creates repeated stops |
| End of shift or cleaning | Leave the line in a controlled condition and reveal hidden wear | Product residue, damaged seals or hoses, loose fasteners, cap or label debris, sensor faces, drains, abnormal wear and parts used | Cleaning reveals a crack, swelling, corrosion, scoring, persistent residue or an unidentified part |
| Weekly or defined operating hours | Inspect items that cannot be judged from output alone | Drive condition, belt or chain tracking, specified lubrication points, filter or water-separator condition, pneumatic leaks, fasteners, terminals where approved, backup status and maintenance trends | Wear is accelerating, a setting has drifted or the task needs access beyond the operator's approved scope |
| Planned production stop | Complete work that requires safe access and downtime | Detailed module inspection, scheduled replacement, alignment, torque or force checks where specified, electrical and pneumatic inspection, safety-device verification and controlled restart | The observed condition changes the planned scope or requires supplier engineering support |
| Event triggered | Respond to a condition that may have changed the machine | Jam, collision, emergency stop, dropped bottle, product spill, utility failure, new product, new package, moved sensor or replaced control component | The original validated settings, alignment, guarding or quality result can no longer be assumed |
Use the machine manual as the starting interval, not as a reason to ignore actual condition. If the final documentation does not identify a task, part or interval clearly, resolve that gap with the supplier before routine operation.
3. Check Each Packaging Line Module
Filling equipment
Inspect the complete product path defined for the project: tank or feed connection, pump or dosing element, hoses, clamps, valves, seals and filling nozzles. Look for leakage, product buildup, damaged surfaces, hardened or swollen elastomers, loose connections and inconsistent cutoff. A change in fill result may come from product temperature, air in the supply, valve timing, nozzle height, seal condition or another process input; do not replace parts before confirming the cause.
Cleaning is part of the operating process but not the whole maintenance plan. Use the liquid filling machine cleaning and changeover guide to map the wetted path, difficult cleaning points and controlled restart.
Capping equipment
Check the cap feeding path, track or chute, pick-and-place or placing mechanism, bottle hold-down, guides, chuck, spindle, belts or tightening head that actually belongs to the machine. Watch for cap dust, worn contact surfaces, damaged threads, unstable bottle control, inconsistent cap presentation and frequent operator adjustments. Verify the finished closure using the buyer's approved method; a displayed setting by itself does not prove the retained application result.
When bottles, neck finishes or closures change, treat the setup as a controlled changeover. The capping machine changeover checklist separates bottle handling, cap feeding, tightening and verification.
Labeling equipment
Inspect the unwind and rewind path, web tension, rollers, peel plate, product and label sensors, applicator, wrap belt or pressing device, bottle guides and waste-liner collection. Clean sensors and contact surfaces only by the approved method. Repeated wrinkles or position drift may point to bottle geometry, label stock, peel-plate setup, web tension or speed matching rather than one dirty component.
Conveyors and line interfaces
Check belt or chain condition, tracking, guides, transfers, supports, drives, accumulation sensors and the handoff between machines. Look for rubbing, bottle instability, debris, loose guides, damaged slats and a growing number of micro-stops. A filler can be mechanically healthy while poor transfer control reduces accepted line output.
Pneumatic, electrical and safety systems
Drain or service air-preparation components only as specified, watch for leakage and confirm that pressure remains within the approved operating range. Trained personnel should inspect cables, connectors, terminals, fans, filters, enclosures, drives and control backups according to the supplied documentation. Safety devices, guards and interlocks require an approved verification procedure; bypassing them is not a maintenance shortcut.
4. Keep Records That Help Diagnose the Next Fault
A checklist that contains only a date and a tick mark cannot show whether a bearing became noisier, a seal lasted fewer hours with a new product, or one capper head required repeated adjustment. Record enough detail to compare condition over time.
Use photos when they make wear or alignment easier to compare, but keep the measurement and acceptance rule in text. Trend repeated stops by module and reason. The goal is to turn “the line stopped again” into an identifiable condition that engineering, maintenance and the supplier can review.
5. Connect Preventive Maintenance to Spare Parts
A planned inspection loses value if the correct replacement part is unidentified or unavailable. Link each maintenance task to the approved part number, stored quantity, location, lead time, substitute rule and minimum reorder point. Separate routine wear parts from critical long-lead items and format parts.
Do not create universal stock quantities. Risk depends on the exact bill of materials, operating schedule, local sourcing, common components across the line and consequence of downtime. Use the packaging machine spare parts guide to build a project-specific register and verify it against the final machine before shipment.
6. Use Planned Stops Before the Line Chooses the Stop for You
Some work cannot be completed while the line is producing. Group tasks that require safe access, disassembly, alignment, electrical inspection, scheduled replacement or a longer controlled test into planned production stops. Coordinate the parts, tools, trained people, cleaning window and restart materials before the stop begins.
- Freeze the scope. List the must-do work, condition-based work and optional work separately.
- Stage parts and documents. Confirm part numbers, tools, drawings, backups and supplier support before production ends.
- Record the as-found condition. Do not remove the evidence that explains why the component failed.
- Control changes. Record any changed setting, sensor position, program, component model or mechanical alignment.
- Restart in stages. Complete safety and dry checks first, then run agreed product and packaging at controlled conditions.
- Close the record. Capture results, open items and the next monitoring trigger before returning the line to normal production.
Track unplanned downtime separately from planned maintenance time. A short scheduled stop can protect output only when the work addresses real condition and the restart is controlled. It should not become a place to make undocumented changes.
7. Confirm the Maintenance Basis Before Shipment
Maintenance readiness begins during purchase and factory testing, not after the first failure. Before shipment, confirm that the final manuals and drawings match the delivered configuration; identify lubrication points and approved materials where applicable; review normal setup values and alarm response; match the spare-parts list to physical items; verify backups; and train the responsible operators and technicians.
Add maintainability checks to the factory acceptance test. Ask trained personnel to demonstrate safe access, inspection, approved change-part removal, cleaning access and controlled restart using the agreed machine and formats. Then repeat the site-specific checks after installation using the actual utilities and line interfaces described in the installation and commissioning checklist.
Define Maintenance Support Before You Order
Send the product, bottle, cap, label, target output, shift pattern, cleaning method, utilities and site service capability. ZXSMART can review how the proposed filling, capping, labeling and conveyor configuration affects maintenance access, documentation, spares and factory-test scope. Final tasks and intervals must match the approved machine and your site's procedures.
Send Project and Maintenance Details8. Buyer FAQ
How often should a packaging machine receive preventive maintenance?
There is no universal interval. Start with the machine manual and approved project documents, then adjust by operating hours, product behavior, cleaning method, environment, component condition and maintenance history. Shift, weekly and planned-stop checks should have named owners and recorded results.
What should operators check at the start of a shift?
After following the site's approved safety and startup procedure, operators can check guards, loose or damaged parts, leaks, air pressure, product-contact cleanliness, sensors, guides, belts, label path, cap tooling and a controlled first-piece result. The exact list must match the supplied machine.
What is the difference between cleaning and preventive maintenance?
Cleaning removes defined product residues or soils. Preventive maintenance also covers inspection, lubrication where specified, adjustment, wear monitoring, records, spares and planned replacement. Cleaning can reveal a defect, but it does not replace the complete maintenance plan.
Which packaging line parts should be checked during a planned stop?
The project-specific list may include filler seals and nozzles, capper chucks or belts, labeler rollers and sensors, conveyor chains or belts, guides, bearings, pneumatic components, electrical connections and safety devices. Only trained personnel should inspect or service equipment under the site's approved energy-isolation procedure.
What information should be recorded after maintenance?
Record the machine and component, date, operating hours or cycles when available, observed condition, measurement, work completed, replacement part and lot, settings changed, verification result, technician and next action. Attach photos or trend data when they help diagnose recurrence.
Research Notes
Public Reddit discussions were reviewed on September 11, 2026 to understand how manufacturers describe maintenance capability, service documentation, spare-part lead time, planned downtime and packaging-line handoffs. These discussions were used only as question and language signals. They are not ZXSMART customer cases, endorsements, verified performance claims or universal maintenance instructions.
- Reddit: a small manufacturer asks how maintenance skill, washdown exposure, service information and spare parts affect an equipment purchase
- Reddit: maintenance practitioners discuss daily, weekly and monthly work, wear parts, logs and spares
- Reddit: brewery operators connect preventive maintenance and a spare-parts library with unplanned downtime
- Reddit: a bottle-line discussion highlights loading, unloading, labor, buffers and the handoff between filling and capping
How This Guide Is Reviewed
Reviewed by the ZXSMART Engineering Team against the current complete-line scoping process, filling, capping, labeling and conveyor module boundaries, published cleaning and changeover guidance, spare-parts planning, installation handover and factory-acceptance framework. Final maintenance tasks, intervals, approved lubricants, access, safety procedures and replacement criteria depend on the delivered machine, component manuals, product, operating conditions and the buyer's site procedures.